Let me start describing the need to migrate my WebApp to a different MySQL database, as this is something you wouldn’t do just for fun! This is a summary of my findings and learnings during this process
I had noticed for a while that while I was browsing through my website, hosted on an Azure WebApp, the page load times were not ideal, even though the size of the content of all my posts is pretty small, and I am also using Cloudflare to cache my content. One of the main reasons I know it is not fast is the fact that I was using the lowest WebApp SKU in Azure for WebApp, which was a Production S1 SKU. I was initially constrained by billing (I have been using a Visual Studio Enterprise) so I needed to use the cheapest SKU. However, while you can still get pretty nice features like custom domains, traffic manager and auto scale, the WebApp memory is constrained to 1.75 GB. The aprox cost for an S1 SKU is around £68 a month
I had then decided to move my WebApp to a different subscription where I am not going to be constrained by billing, and I can now afford more than the S1 SKU WebApp 🙂 I was hoping that doing an uplift in terms of memory resources was going to be a good starting point to increase the performance and page load of my WebApp. Therefore, I had then decided to upgrade to an P2V2 SKU which gives me 7 GB of memory
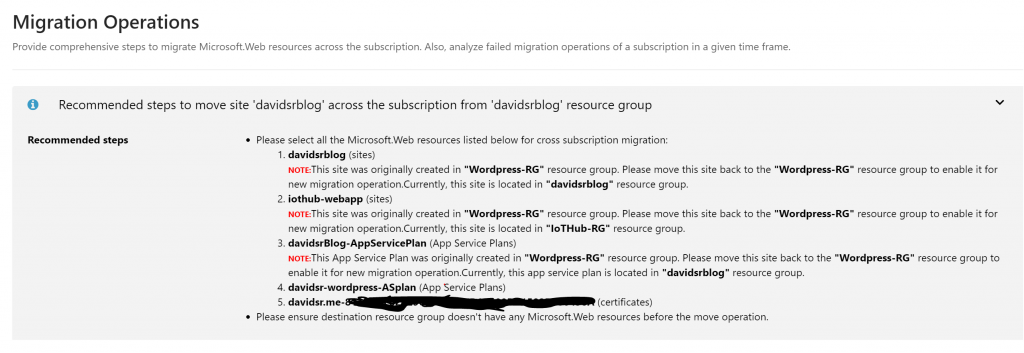
The process to migrate your WebApp to a new subscription is pretty smooth. However, in my case I was caught up by the fact I had previously migrated my WebApp between Resource Groups and that proves to be cumbersome when you want to migrate your WebApp to a new Subscription. Best piece of guidance to run through this process is to use the ‘Diagnose and Solve problems’ tab of your Azure WebApp, going through ‘Migration Options’ and there you will see a detailed list of steps you need to do to run through an effective subscription migration. I loved this guidance,as I am not an Azure WebApp expert and really appreciate this prescriptive guidance on the process. Using ‘Migration Options’ is how I learnt I needed to move back my Azure WebApp to my original resource group, the one that was used to create the WebApp
The next thing is to uplift the Database. In this case, I’ve got an Azure Database for MySQL. Again, during time of creation of app I was also constrained by the pricing element of the Database. While I knew I could use a MySQL in-app database, I preferred to rely on a separate database that runs as PaaS instance that can be scaled out of the WebApp and don’t need to look after the MySQL server element (use as much PaaS instances as possibles and move away of IaaS instances). I had then decided to use Basic Gen5 MySQL Database, using 50 GB of storage and 2 vCores. The monthly estimated cost is around £ 45. This cost added to the WebApp cost, plus the fact you may want to use Azure App Insights to view your application performance metrics, live metrics, maybe Log Analytics to query for a few more interesting bits, that’s definitely going to exceed my Visual Studio Enterprise credits
That’s being always the main challenge to host a website running PaaS instances with this type of subscription. Luckily, things have changed in time and I can now afford using a more enterprise type of subscription which gives me the option to scale the front and back end of my webapp, and what is very interesting for me, use all the built-in features of MySQL database
The next challenge appeared when I just wanted to scale up the MySQL database. Another part of findings is to realize that you can’t simply scale up a Basic MySQL DB to a General Purpose or Memory Optimized. This is simply not possible
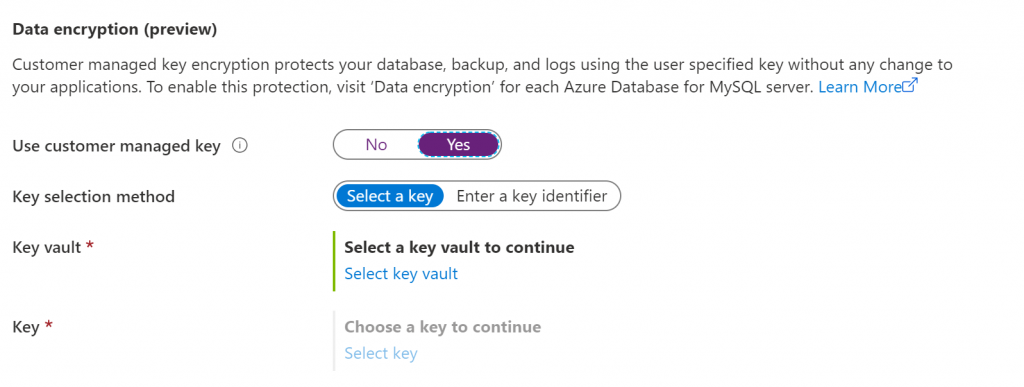
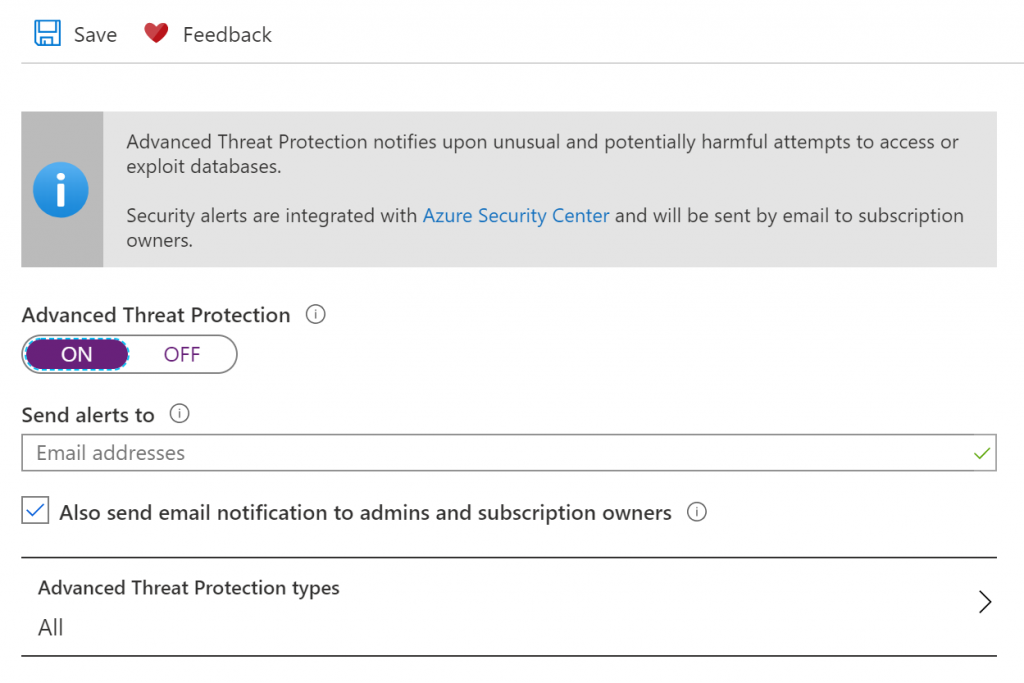
What was the point to scale up MySQL database? Well, even for a simple webapp, a Basic database may be enough, I’ve been always curious to test the great Azure ATP (Advanced Threat Protection) features of my application. I wanted to have a threat detection element within my app, so I can trace whether my application is being the target of bots, injection attacks or possible data exfiltration. You need a ‘General Purpose’ or ‘Memory Optimized’ MySQL database to get those features as it needs more compute and memory to afford those security controls. And not only that, moving away from the Basic database SKU you can also use more features under ‘Security’ tab like Private Endpoint and data encryption using your own key. This effectively uses the concept of ‘Customer Managed Key’ and you can store your asymmetric key in Azure Key Vault. Your CMK will wrap the symmetric data encryption key used to protect data at rest in your database
With Private Endpoints, you can effectively connect to your Database using a private IP address. So this is basically removing the need of having to use public endpoints to connect to a PaaS instance in Azure. That’s definitely great for privacy and compliance reasons. Traffic stays within the Azure virtual network backbone and never hairpins to Internet
The bit that I am really interested here is to operationalize the ATP feature and integrate all those alerts and incidents with Azure Security Center and Azure Sentinel. Who hasn’t seen any SQL injection or brute force attack on a publicly exposed database in the cloud? I always recommend to use a defense in layer approach by using strong IAM controls like Azure AD for database authentication (do not use local accounts!), IP restrictions within the WebApp and possibly an Azure WAF to protect your front end application from malicious bots
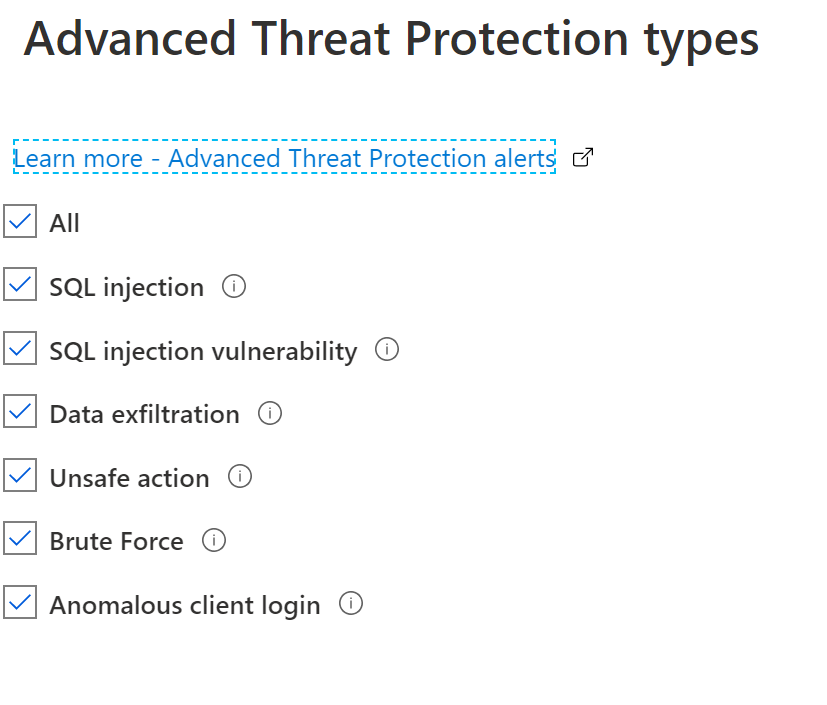
This means that out-of-the box you get all this threat detection types, without having to run any complex detection queries!
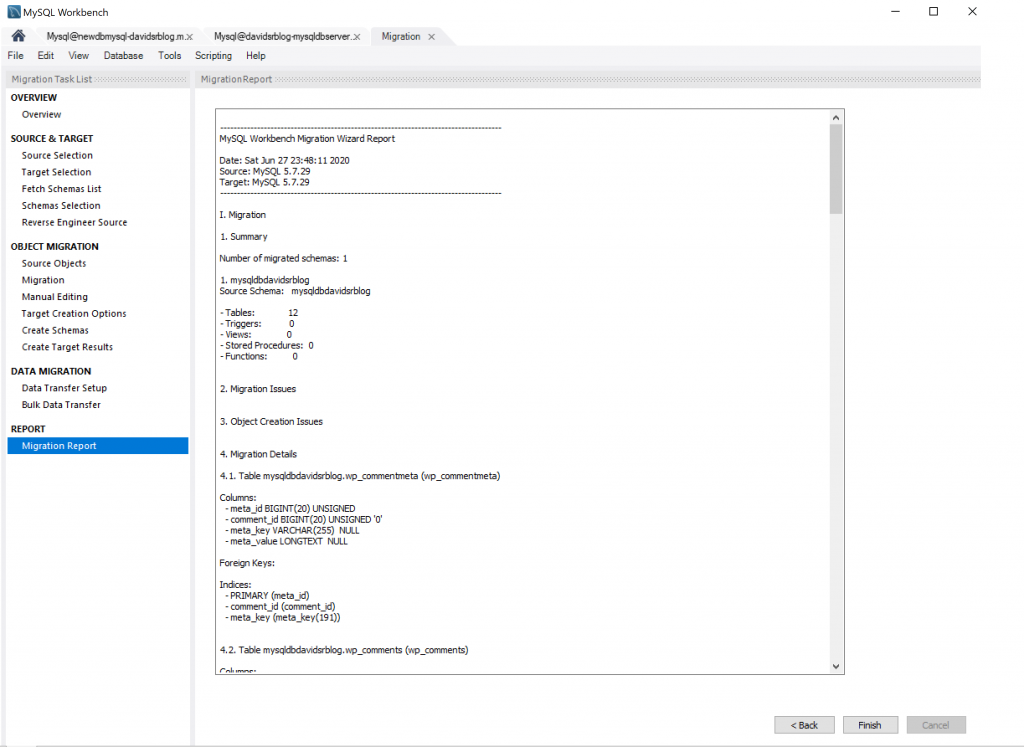
I have effectively now created my new MySQL Database on a higher SKU which gives me access to this nice security features. But now it comes the point where I need to migrate my website content to the new database. Not being a database expert, I have found there are many blogs about using MySQL workbench for this process. It’s a relatively simple process to follow, you just need to make sure you have access to the old and new database, you are using an account that has permissions to do a database migration, and things should work out of the box. You just need to click on ‘Database’ in MySQL Workbench and then ‘Migration Wizard’
Last but not least, you need to make sure your Azure WebApp now talks to the new database. We will edit the ‘Connection Strings’ under ‘Settings’ and ‘Configuration’ and use the right parameters of your new database

0 Comments